


Comprehensive Guide to Choosing the Right 5 Inch Buffing Pad for Orbital Sander
The Ultimate Guide to 5 Inch Buffing Pad for Orbital Sander
Achieving a flawless finish on your projects relies heavily on the right tools, and a high-quality 5 inch buffing pad for orbital sander is essential. Whether you're a professional detailer, a woodworking enthusiast, or working on automotive projects, understanding the different types of pads, their applications, and how to choose the best one can significantly improve your results. This article provides a comprehensive guide to 5 inch buffing pads, covering everything from materials and grit levels to optimal usage and maintenance. Let's dive into the world of buffing pads and discover how to achieve a professional-grade finish.

Understanding Buffing Pad Materials
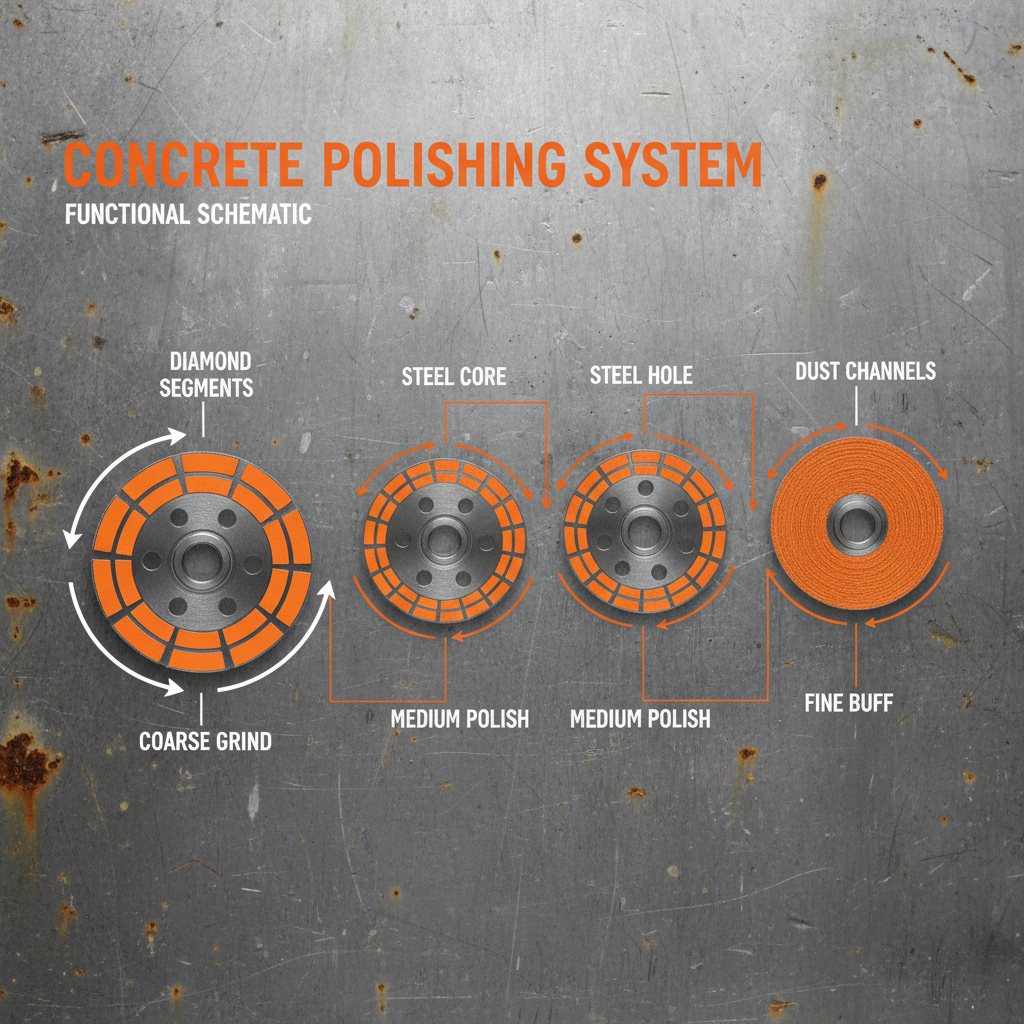
Buffing pads come in a variety of materials, each offering distinct advantages. The most common materials include foam, microfiber, and wool. Foam pads are versatile and widely used for polishing, compounding, and finishing. They're gentle on surfaces and ideal for removing swirl marks and imperfections. Microfiber pads offer more cutting power than foam, making them suitable for removing moderate to heavy defects. They also generate less heat, reducing the risk of paint damage. Wool pads are the most aggressive option, designed for removing severe scratches, oxidation, and coatings. However, they require careful use to avoid damaging the underlying finish. Choosing the right material depends on the severity of the defects you're addressing and the desired level of gloss.
Grit Levels and Their Applications
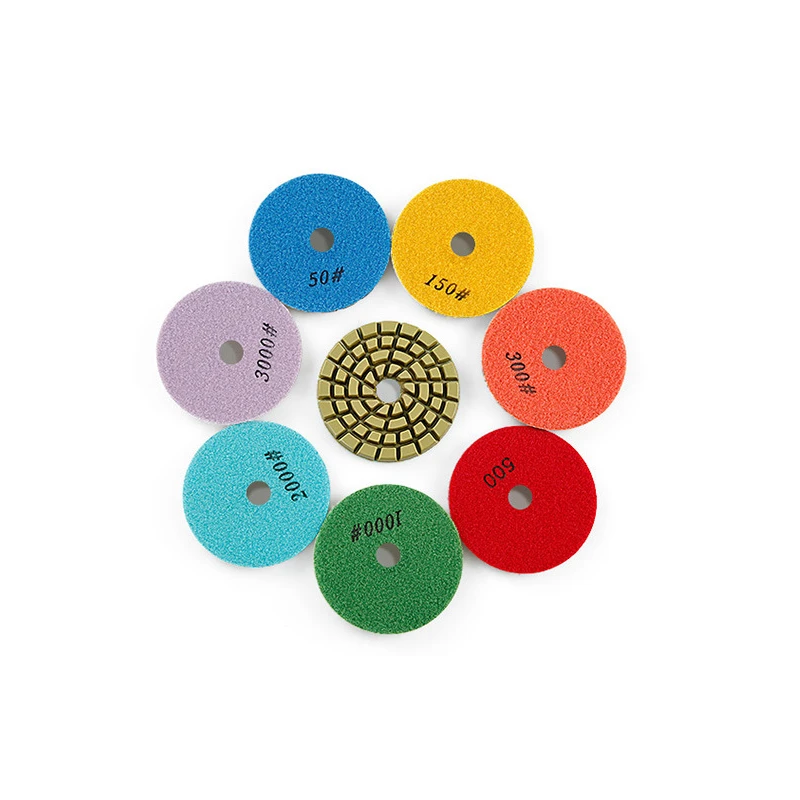
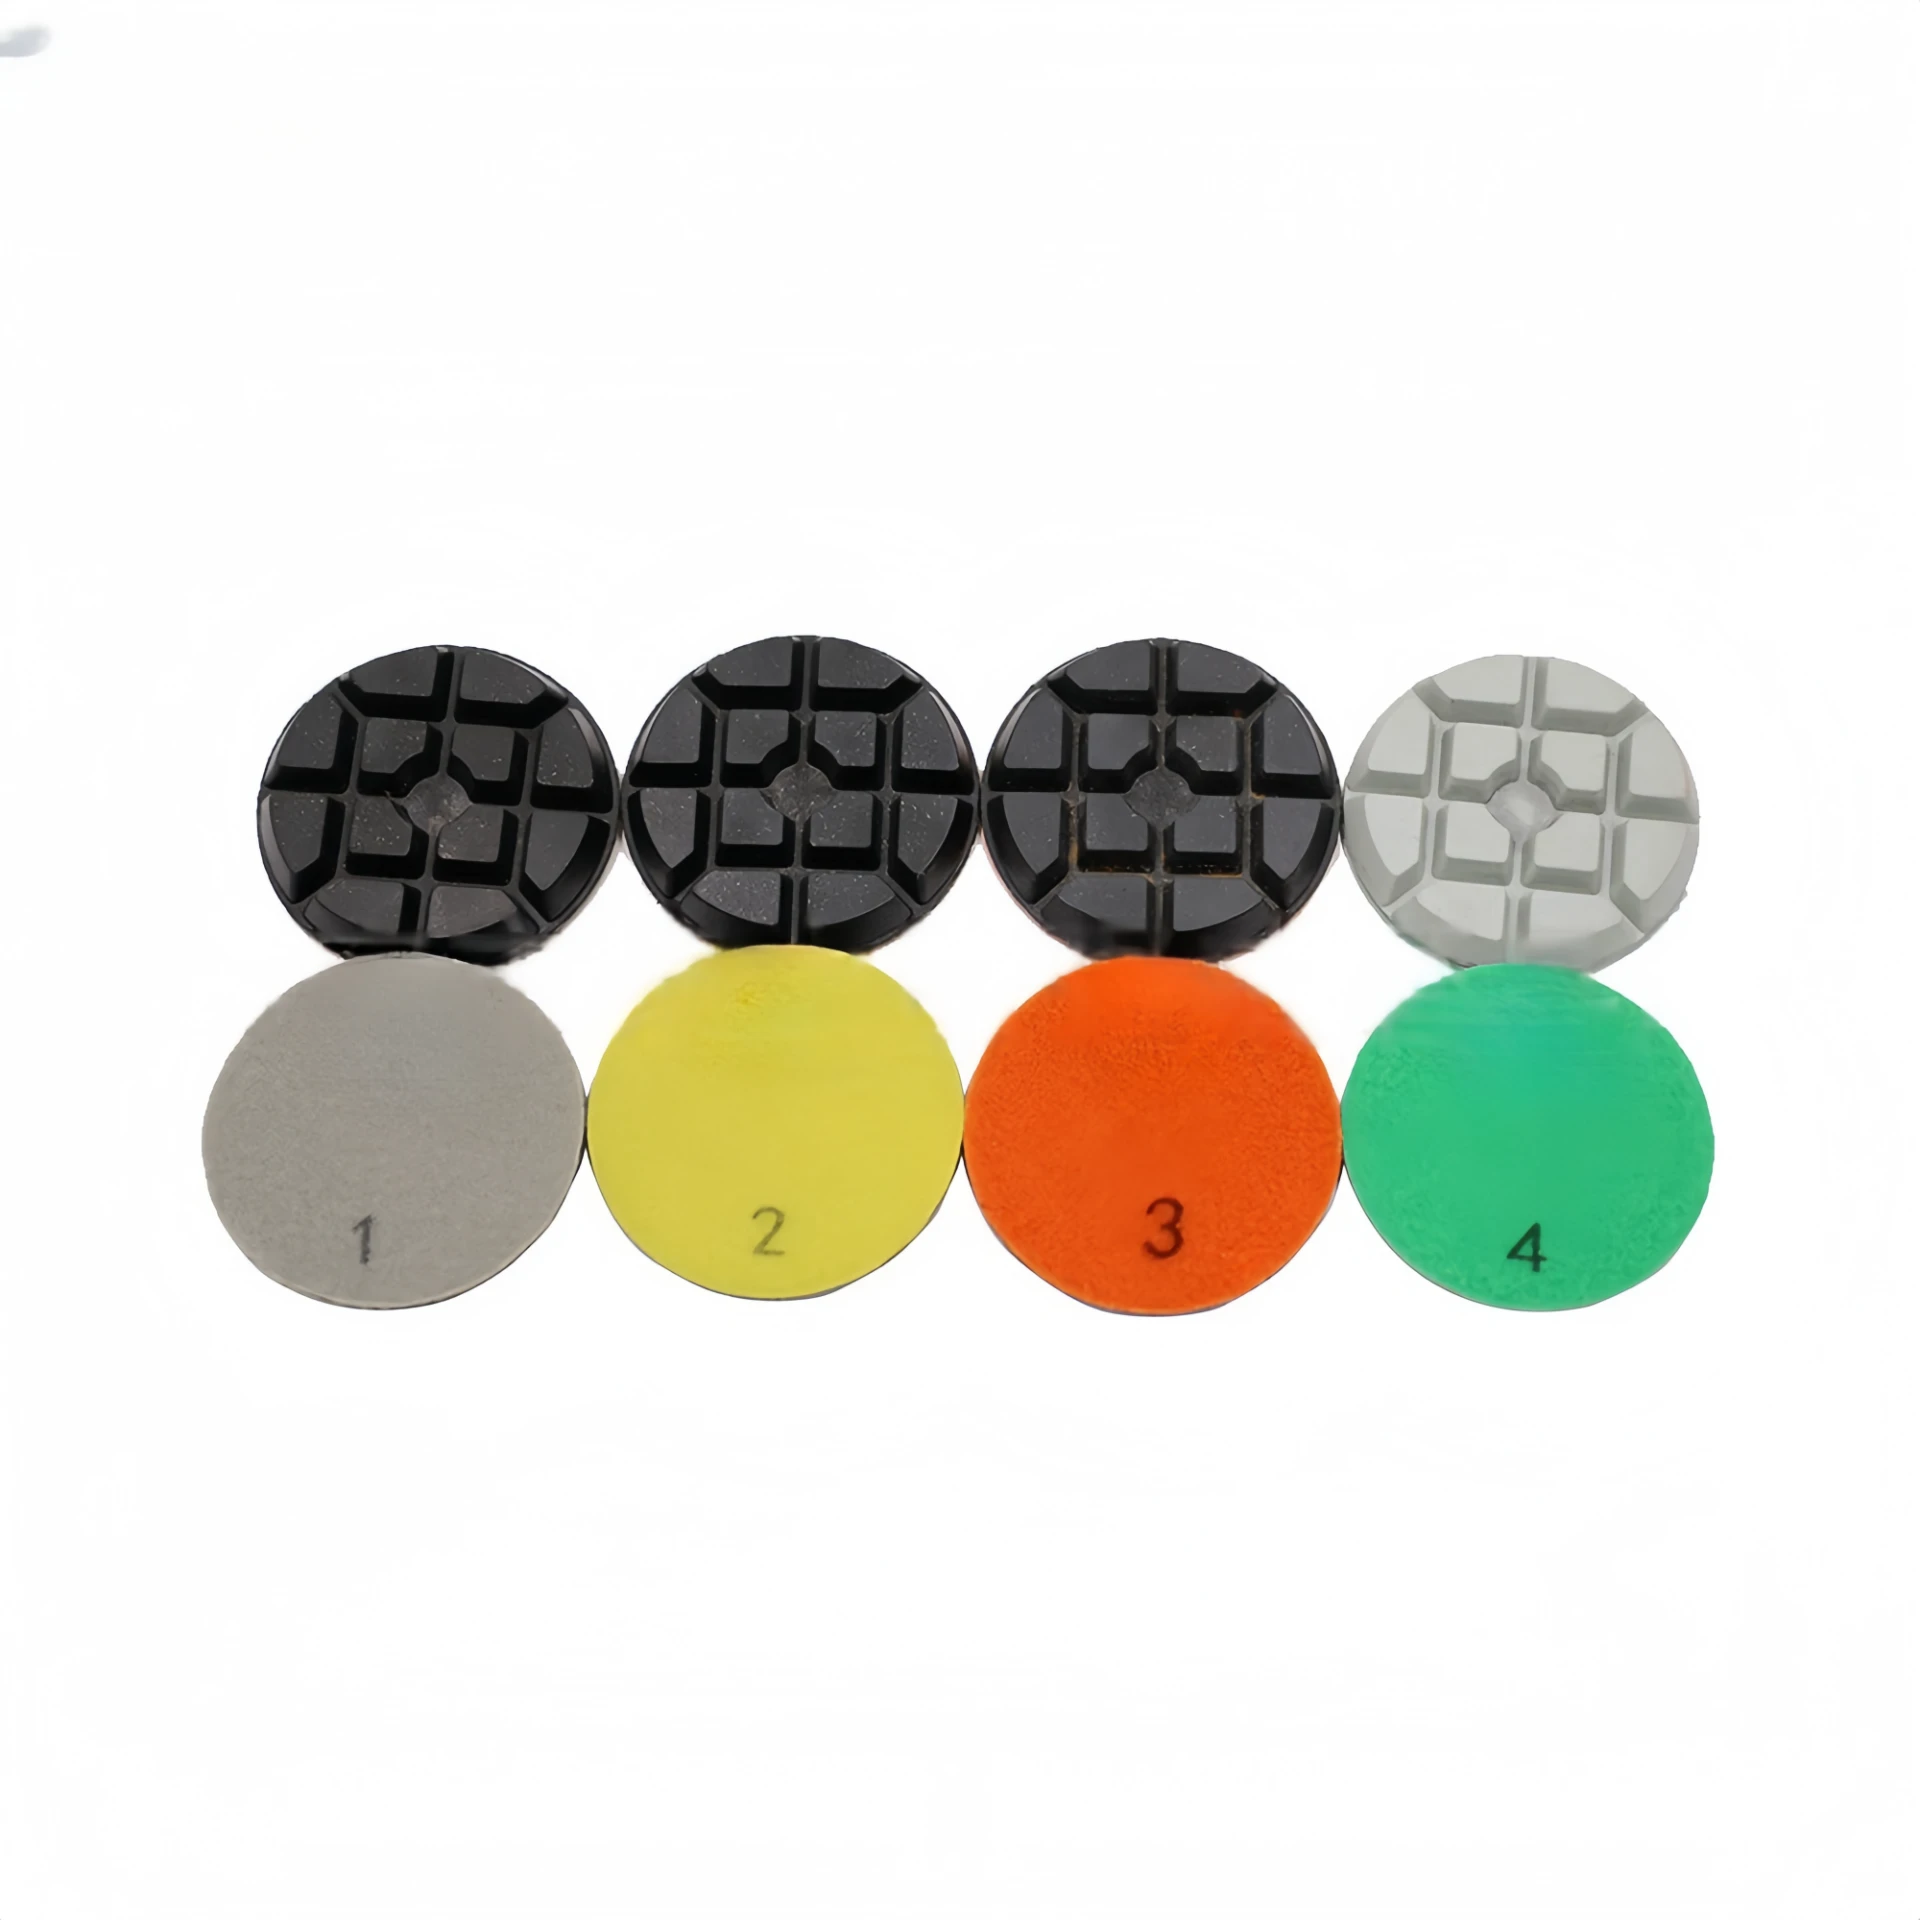
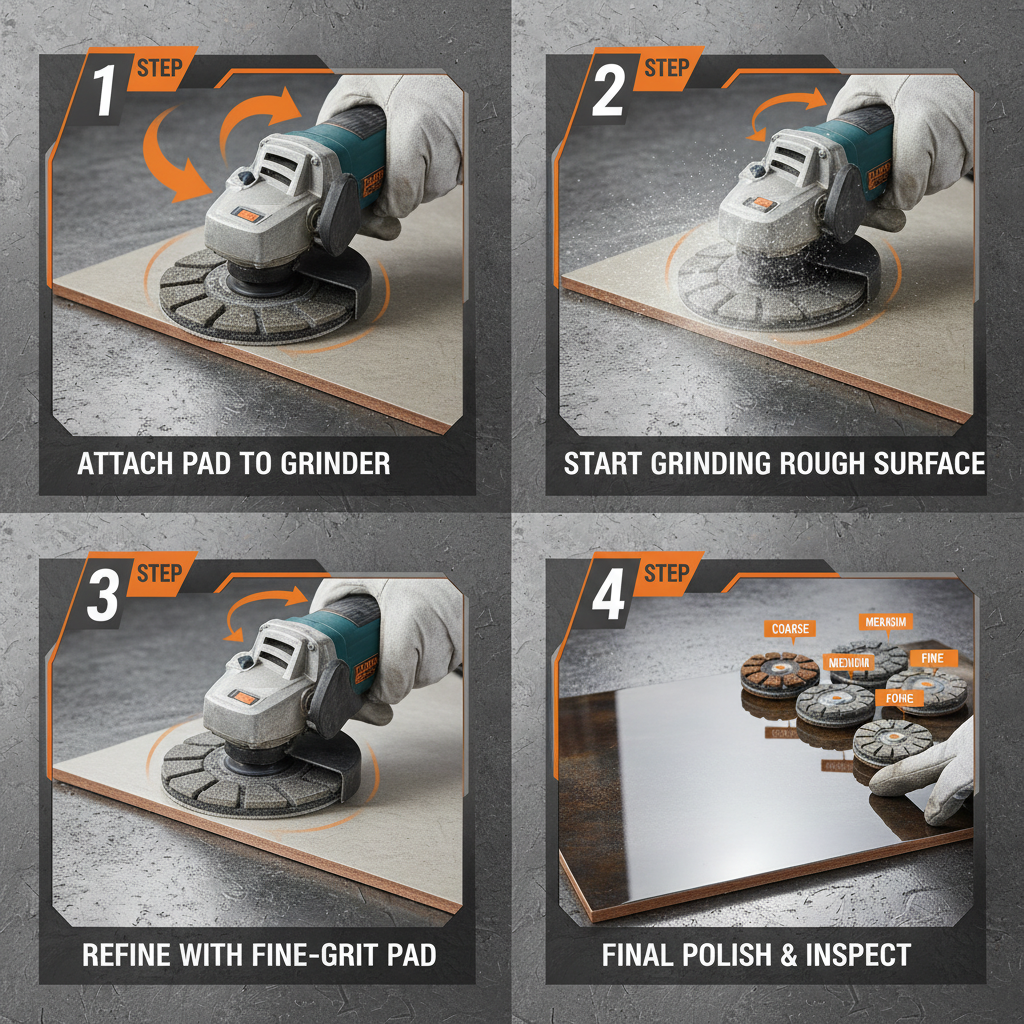
Buffing pads are often categorized by their grit level, which determines their aggressiveness. Lower grit numbers indicate more aggressive pads, while higher numbers signify finer polishing pads. Coarse grit pads (e.g., 80-180) are used for removing heavy scratches and oxidation. Medium grit pads (e.g., 200-300) are ideal for removing swirl marks and moderate defects. Fine grit pads (e.g., 400-600) are used for polishing and refining the finish, while ultra-fine grit pads (e.g., 800-1200+) are employed for final polishing and achieving a high-gloss shine. Using the correct grit sequence is crucial for achieving optimal results. Starting with a more aggressive pad and gradually moving to finer ones ensures a smooth and flawless finish.
Key Takeaway: A systematic approach to grit levels – from coarse to fine – is vital for achieving a professional-quality finish, eliminating defects, and maximizing gloss. Don’t skip steps!
5 Inch Buffing Pad for Orbital Sander: A Comparison Chart
Selecting the right 5 inch buffing pad can be overwhelming. Here's a comparison chart to help you understand the key differences between common pad types:
Choosing the Right Pad for Your Orbital Sander
When selecting a 5 inch buffing pad for orbital sander, consider the following factors: Pad size – ensure it matches your sander’s pad size. Backing plate – choose a pad compatible with your sander’s backing plate (hook and loop or threaded). Material – select a material based on the severity of the defects. Grit level – start with a coarser grit and gradually move to finer ones. And finally, consider the specific application: polishing paint, refining wood finishes, or restoring headlights all require different pad selections.

Maintaining Your Buffing Pads
Proper maintenance extends the life of your buffing pads and ensures optimal performance. After each use, clean the pad with a pad cleaning brush to remove compound residue. Regularly inspect the pad for wear and tear, and replace it when it becomes worn or damaged. Storing pads in a clean, dry place away from direct sunlight is also essential. Properly maintained pads deliver consistent results and save you money in the long run. Explore the extensive selection of high-quality buffing pads available at MyDiamondBlade.com.
Conclusion: Achieving a Showroom Finish
Investing in the right 5 inch buffing pad for your orbital sander, understanding grit levels, and practicing proper maintenance are crucial steps towards achieving a professional-grade finish. With the information provided in this guide, you’re well-equipped to select the perfect pad for your needs and tackle any polishing or buffing project with confidence. Visit MyDiamondBlade.com today to explore our wide range of high-quality buffing pads and accessories!
Frequently Asked Questions (FAQs)
How often should I replace my buffing pad?
The lifespan of a buffing pad depends on usage frequency and the materials you’re working with. Generally, foam pads should be replaced every 20-30 hours of use, while microfiber and wool pads can last longer with proper maintenance. Look for signs of wear, such as flattening, cracking, or excessive residue buildup. A worn pad will be less effective and can even damage the surface you’re working on. Regularly cleaning and inspecting your pads is essential to determine when replacement is necessary.
Can I use the same buffing pad for polishing and compounding?
It’s generally not recommended to use the same pad for both polishing and compounding. Compounding involves removing defects, which generates more heat and wears down the pad more quickly. Polishing is a finer process that requires a cleaner, less aggressive pad. Using a pad previously used for compounding can introduce swirl marks and imperfections during polishing. It’s best to dedicate separate pads for each stage of the process to achieve optimal results.
What is the best way to clean a buffing pad?
The best way to clean a buffing pad is to use a pad cleaning brush and pad cleaner specifically designed for buffing pads. Gently brush away compound residue and debris, and then apply the pad cleaner according to the manufacturer's instructions. Allow the pad to dry completely before storing. Avoid using harsh chemicals or solvents, as they can damage the pad’s material. Regular cleaning will prolong the life of your pads and ensure consistent performance.
How do I know which grit level to start with?
Start with a less aggressive grit level if you’re unsure. It’s always better to start conservatively and increase aggressiveness if needed. If the surface has significant scratches or oxidation, you may need to begin with a coarser grit (e.g., 80-180). For minor swirl marks and imperfections, a medium grit (e.g., 200-300) may be sufficient. Always test the pad on a small, inconspicuous area first to assess its effectiveness and avoid damaging the surface.
Related Products
Related Products


Address
No.30 Gaoying Road ,Chang'an District,Shijiazhuang,Hebei Province
Business Hours
Mon to Saturday : 8.00 am - 7.00 pm
Sunday & Holidays : Closed
.png )


